Jewelry making techniques using modern design tools. We cover the complete process, from conception and jewelry design to 3D printing.
Advisory: You have to ensure that what you make based on any designs here is safe for use. Safety is your responsibility; use your judgement; we do not claim that any of the designs here are fit for any specific purpose.
bracelets decorations jewelry misc rings toolsReady-to-use models: how to find and import.
27 Oct 2019 - Hristo
An easy way to enhance a design you are working on is to include a model that someone else created and shared. This is what we did with the dragon bracelet for example. This opens up two questions: how do you find such models, and what does it take to prepare them for import as objects in OpenSCAD.
The first part is relatively easy. There are a number of websites that specialize in distributing 3D models from a number of hobbyists as well as professionals. Thingiverse is one such service; if you search for “dragon”, you might get a selection of models in a variety of formats:
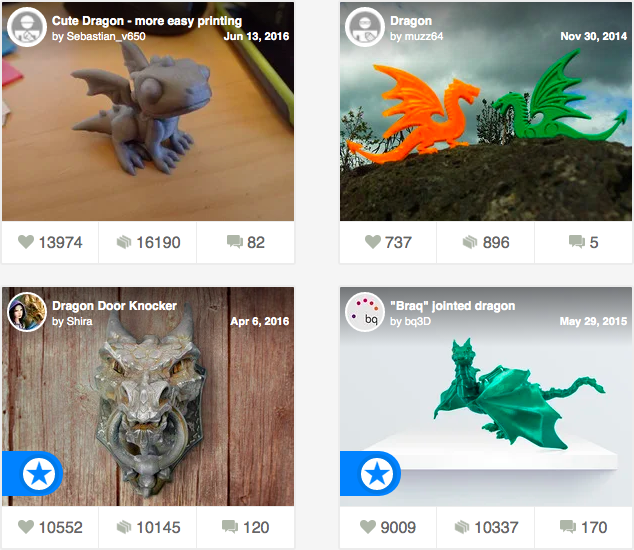
You will likely want models with STL files available, so that you can use those directly. Note that many entries from your search will contain multiple STL files, such as versions with or without supports for printing, or perhaps with separated components. Lastly, but importantly, pay attention to license terms, especially if you are using models for commercial purposes.
Once you download a model and review the STL files, you may come across some challenges. Perhaps the model is so detailed that its size simply too great—this will make processing in OpenSCAD slow, and might also prevent you from uploading the finished STL file to online 3D printing websites such as Shapeways or i.Materialise—the limits imposed by these services are often in the tens of M-bytes.
Apart from being too large, the downloaded model might not represent a correct, printable 3D solid. This could happen due to any possible number of 3D mesh defects, such as inverted faces or holes in the surface; defects like these are sometimes present in 3D scans. In such a situation, it is possible you will get an error in OpenSCAD and the imported object will be completely missing from the rendering:

The first tool we will introduce helps you reduce the size of an STL file by “simplifying” the mesh. MeshLab is open source and lets you manipulate meshes in many ways, including correcting some of the defects we mentioned earlier.
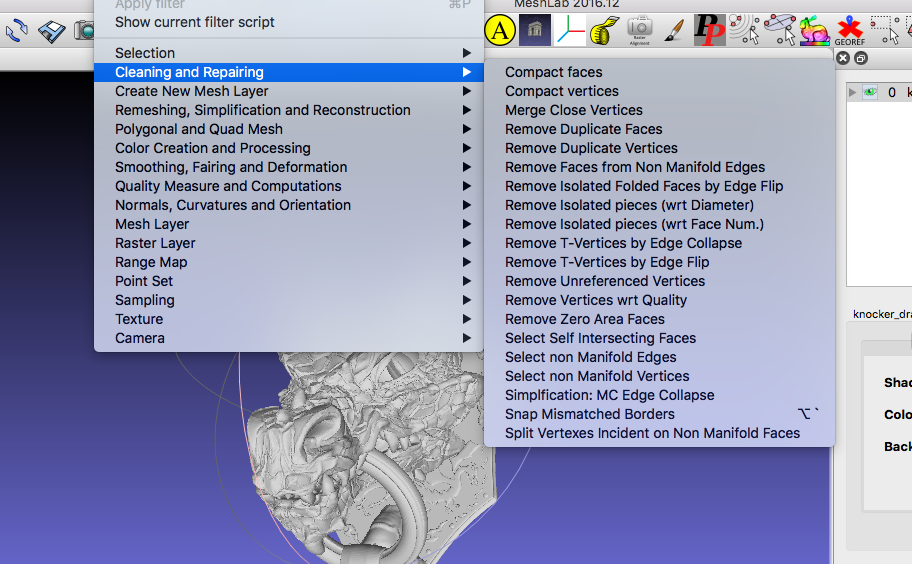
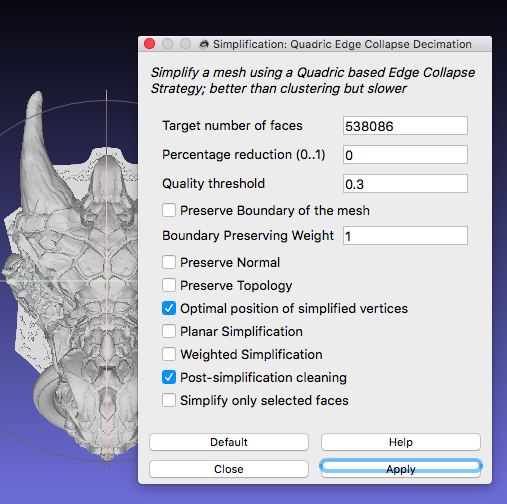
In our experience MeshLab can not correct at least some defects, such as those present in the dragon knocker model. This is why we stuck to using MeshLab for reducing the model size; when doing this, use the suggested parameters and reduce the size by a factor of two at a time—doing this multiple times produces better results than attempting to reduce size by a greater factor all at once:
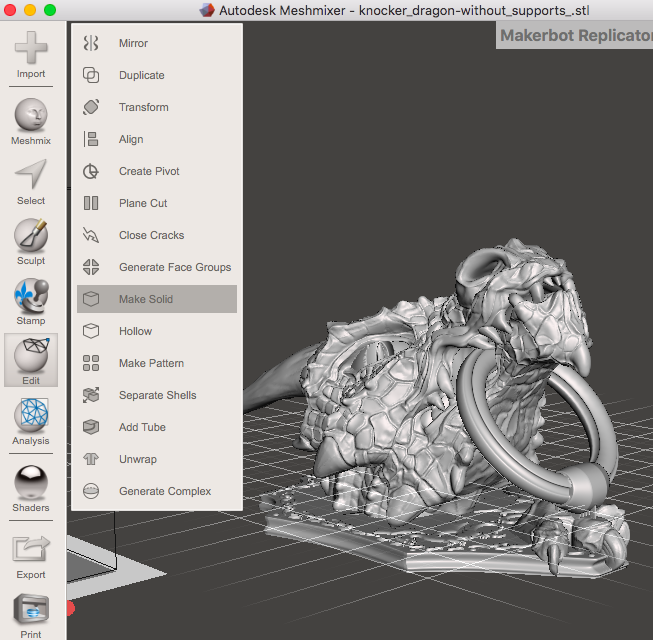
Once your model is smaller, you can run it through Meshmixer (a tool made and distributed by Autodesk). In Meshmixer, we found that running “Make Solid” easily produces a valid (printable) STL model which can then be successfully imported into our OpenSCAD designs.
When applying “Make Solid”, you may need to experiment with mesh density options: using the defaults may result in a solid model that is too coarse, losing some of the fine details that you would like to print with your design. In any case, when transforming a 3D mesh you will often need to make trade-offs between preserving original details and producing a model that is suitable for making part of your design and 3D printing.
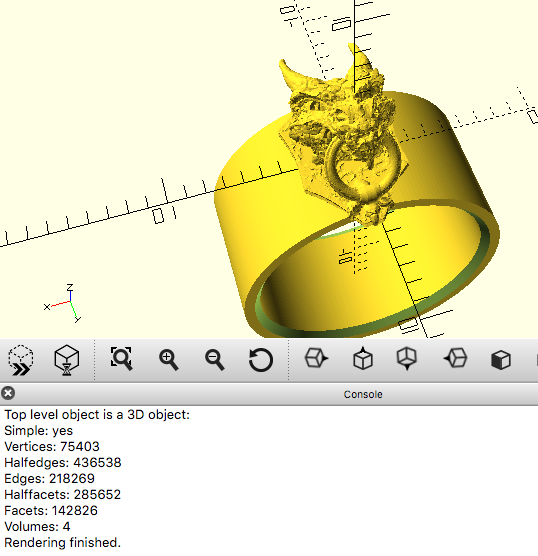
Once you are done transforming your model and it is a correct solid and of an acceptable size, you should be ready to import it into your OpenSCAD code. Test that the imported STL file is correct by doing a full rendering (not just preview) of your OpenSCAD code (use F6 rather than F5). The result should contain all the elements that you expect, including imported objects:
Happy mixing!
